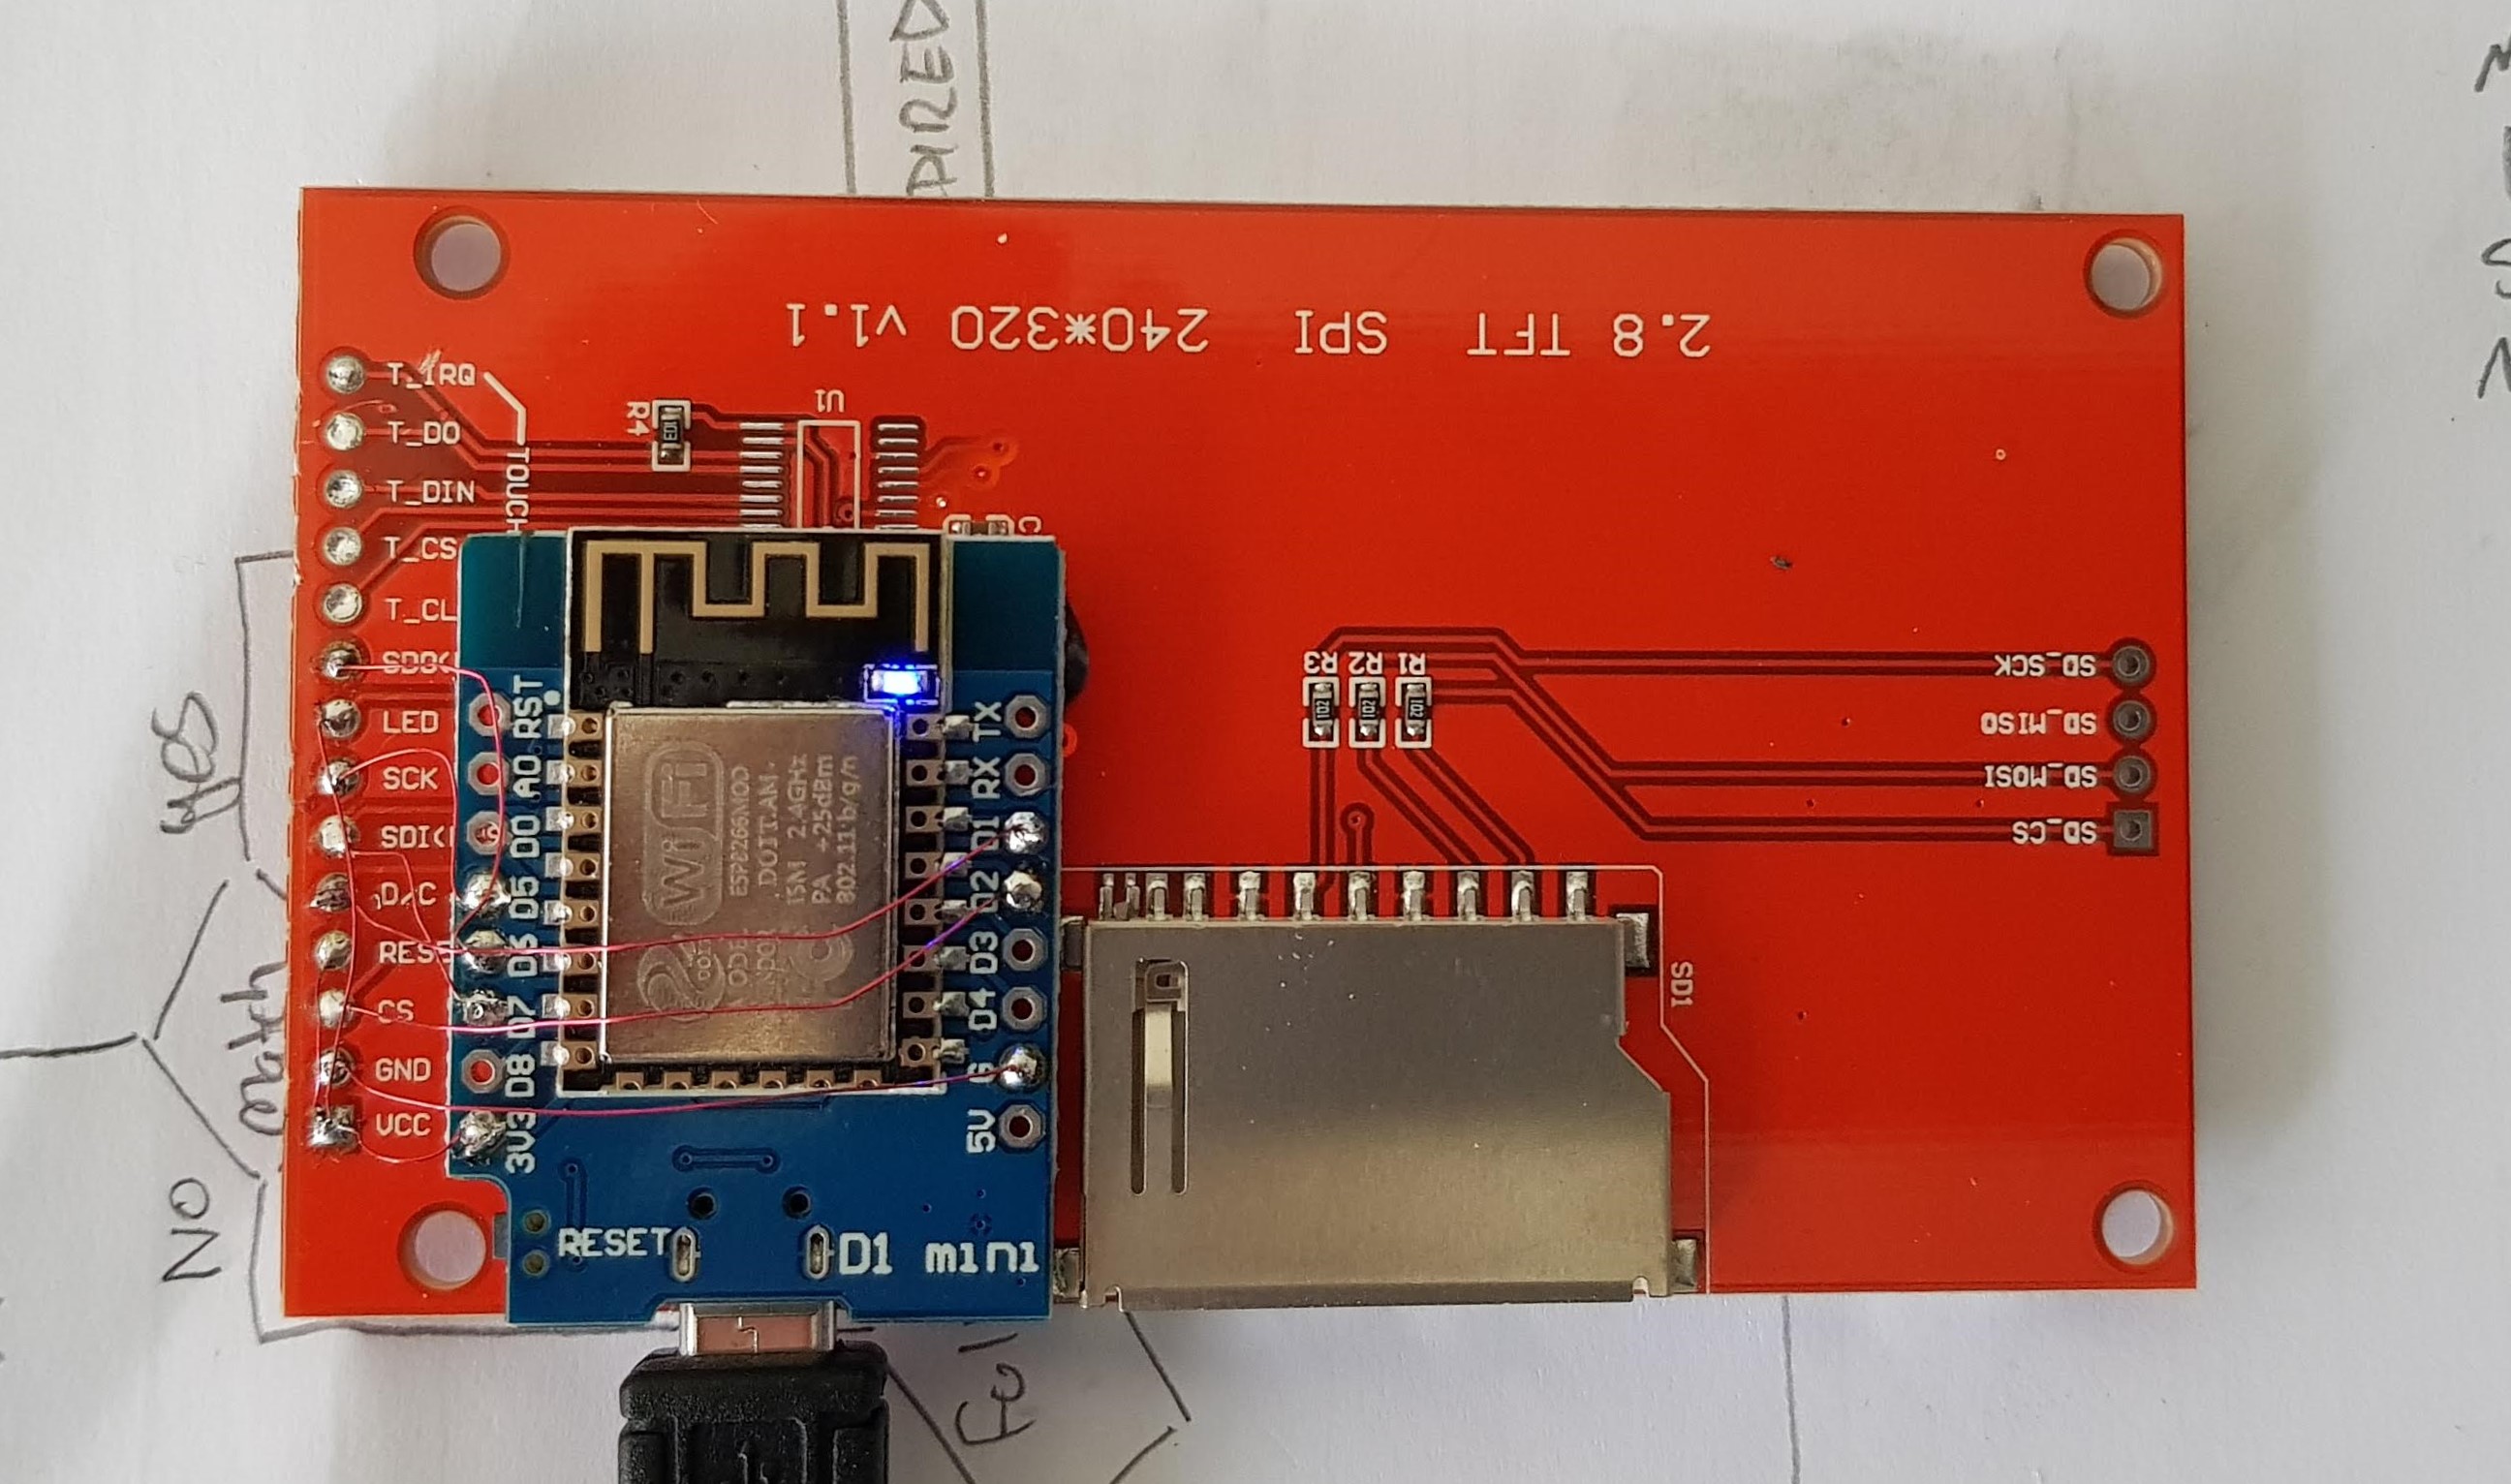
A battery management system needed to be added and this proved to be tricky. For convenience we want a rechargeable battery and, like any gadget, to be able to charge it from USB. The unit draws 170mA and I opted for a 1000 mAh lithium battery which includes battery protection from overcharge, short-circuit etc. This should see up to 5 or more hours use. I used a charge management chip and programmed the charge current to 300mA. This conservative charge rate means a very safe 3.5hr charge time and doesn’t demand too much from the battery.
Prototyping The Case
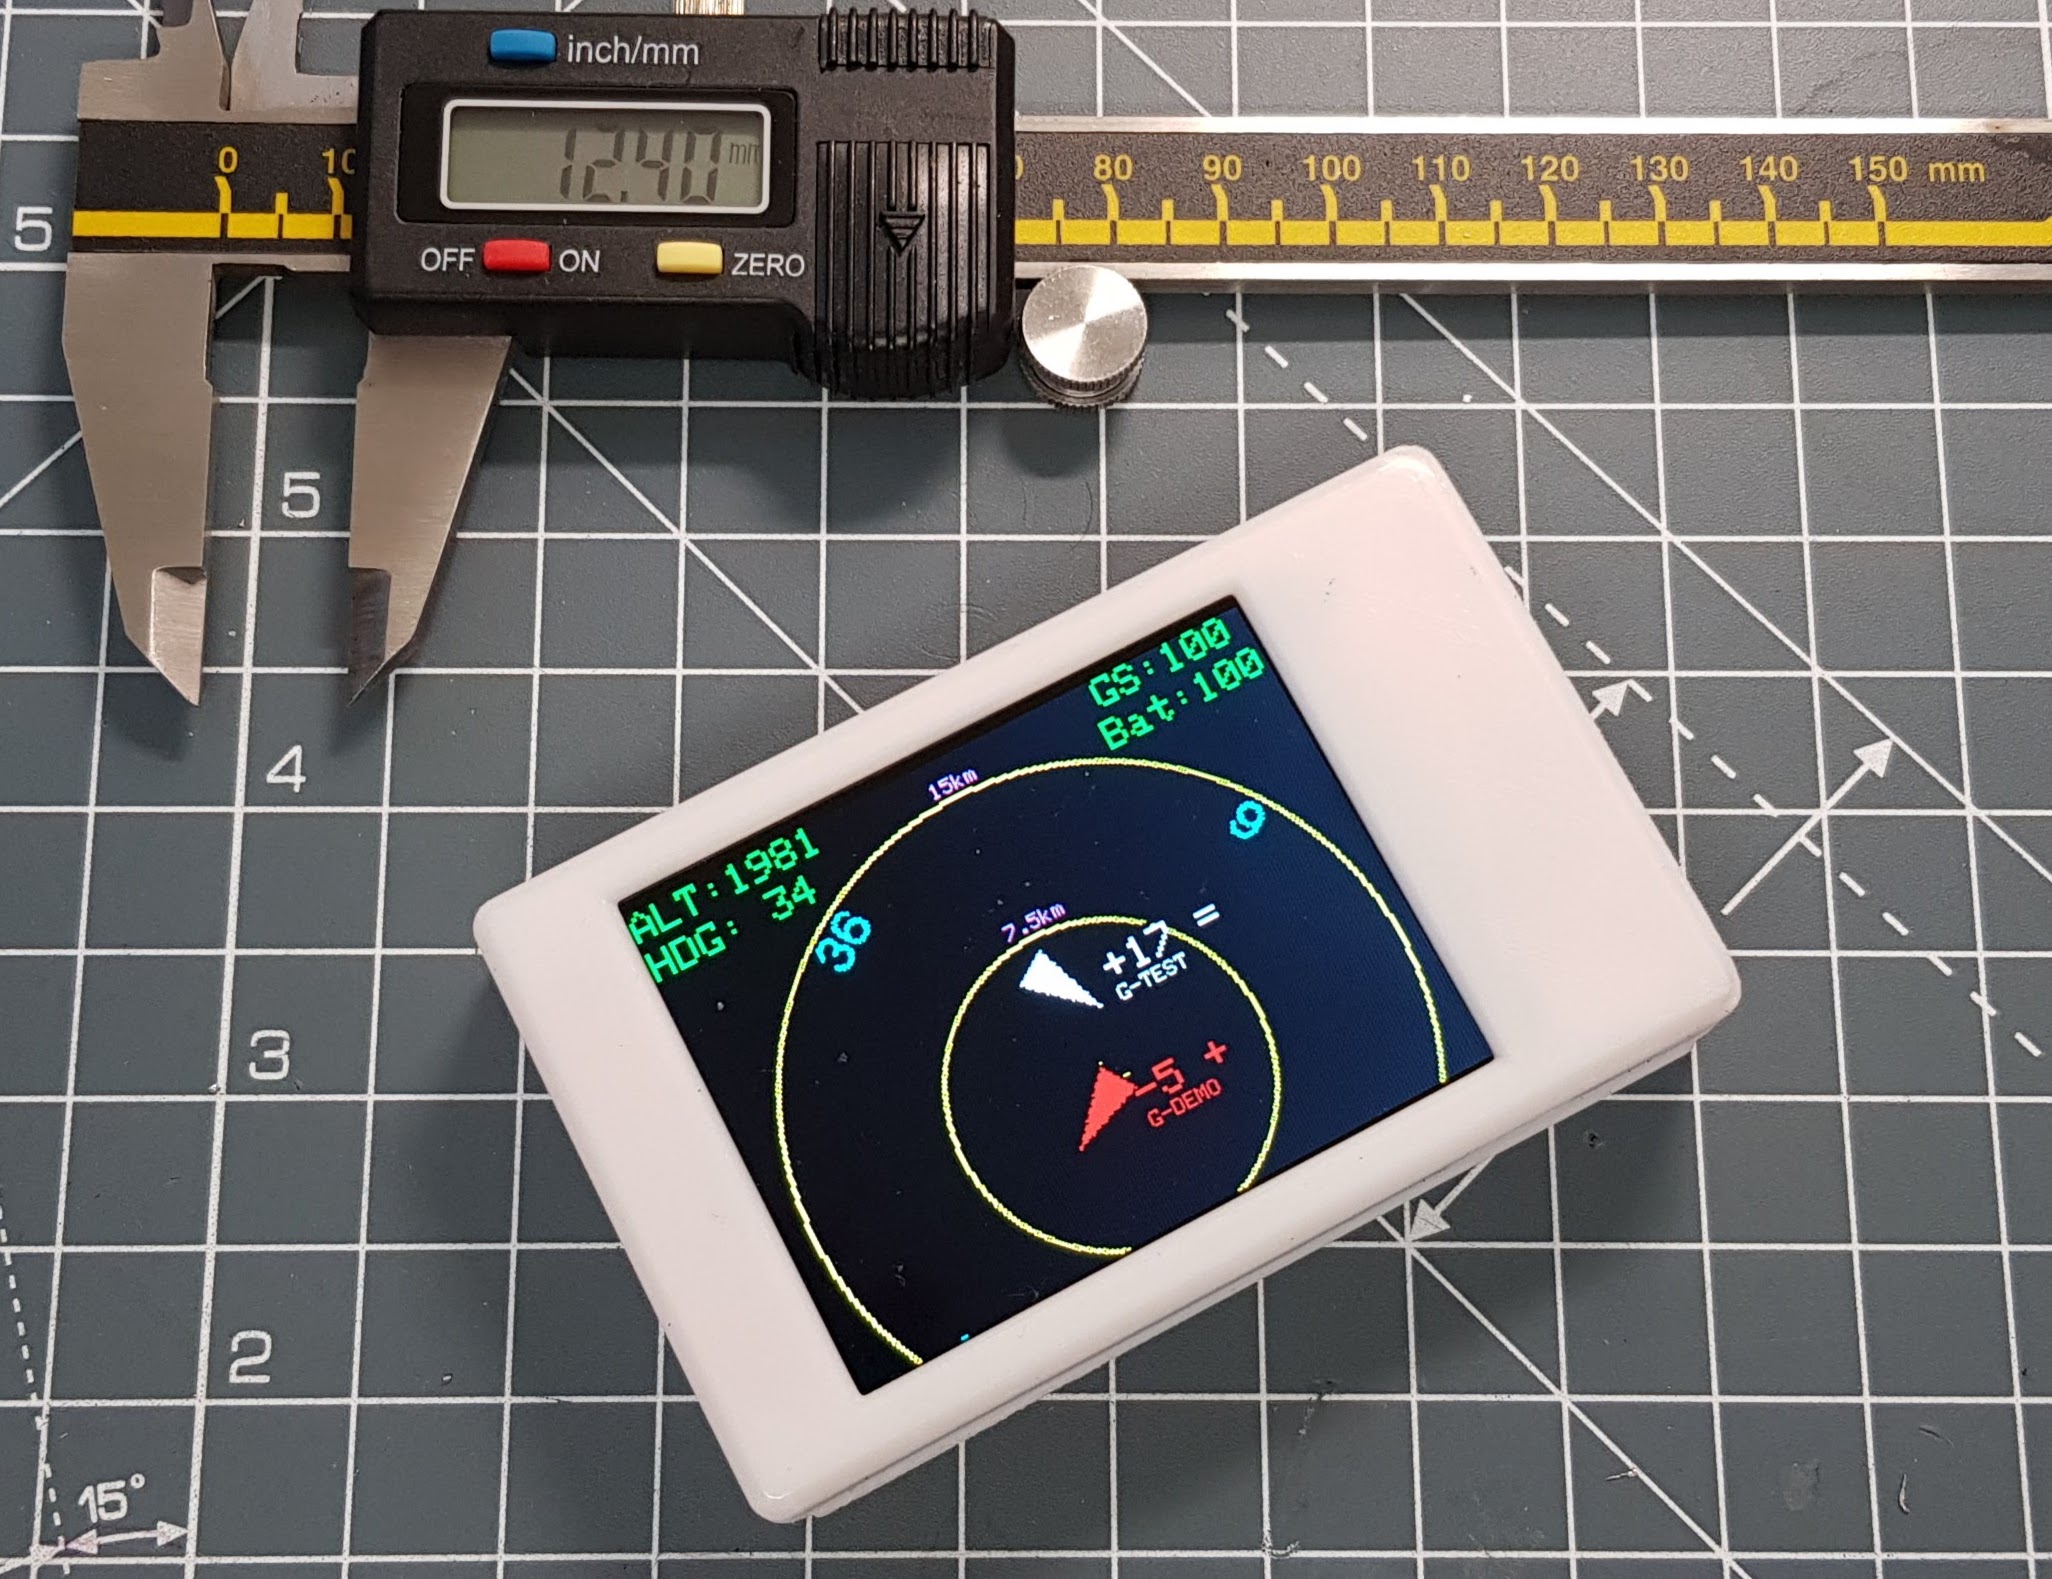
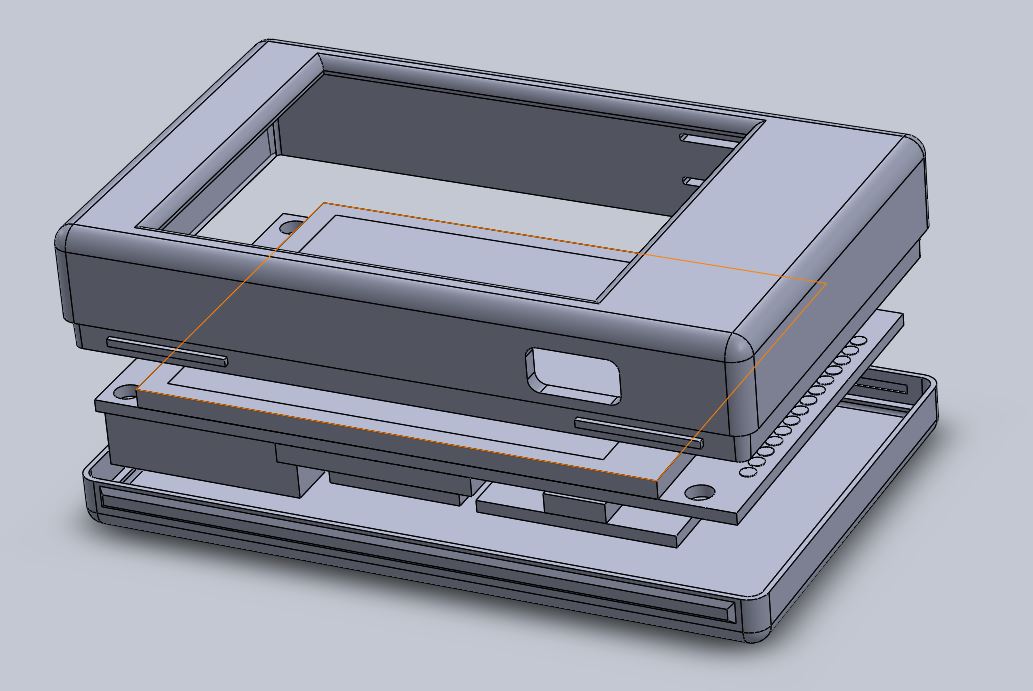
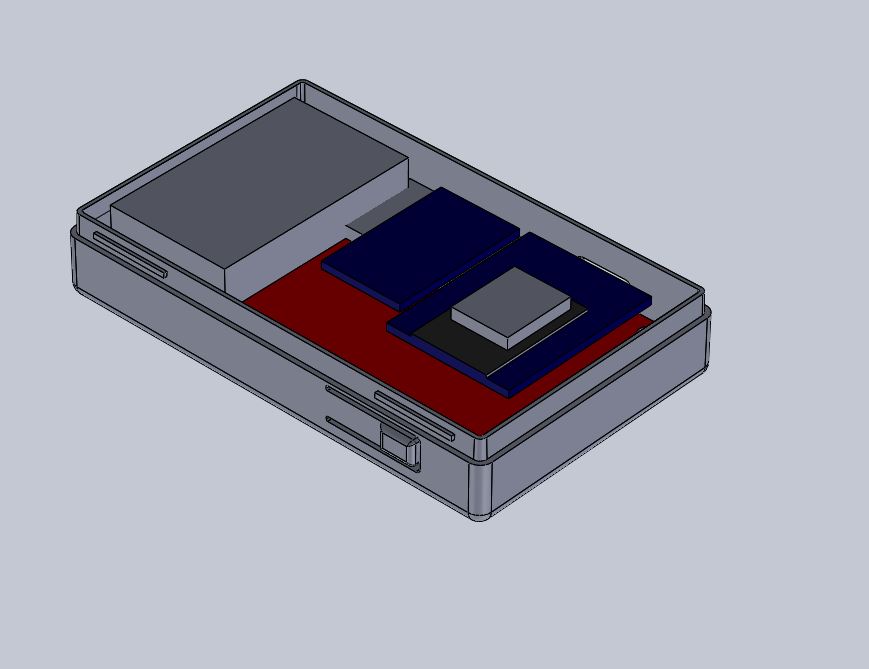
I wanted to make a device that was as small and lightweight as possible. After modelling the display PCB, all the other parts were modelled as accurately as possible. Finally we know the minimum size the case can be. Originally I designed it with screws, but then I realised I was still thinking like it would be made from milled metal – now I can 3D print a case I can make it snap together. Note the two tabs on the top part which snap in to the bottom part. The thinnest shell I was comfortable with was 2mm and this makes the case a feather weight and yet still surprisingly rigid.
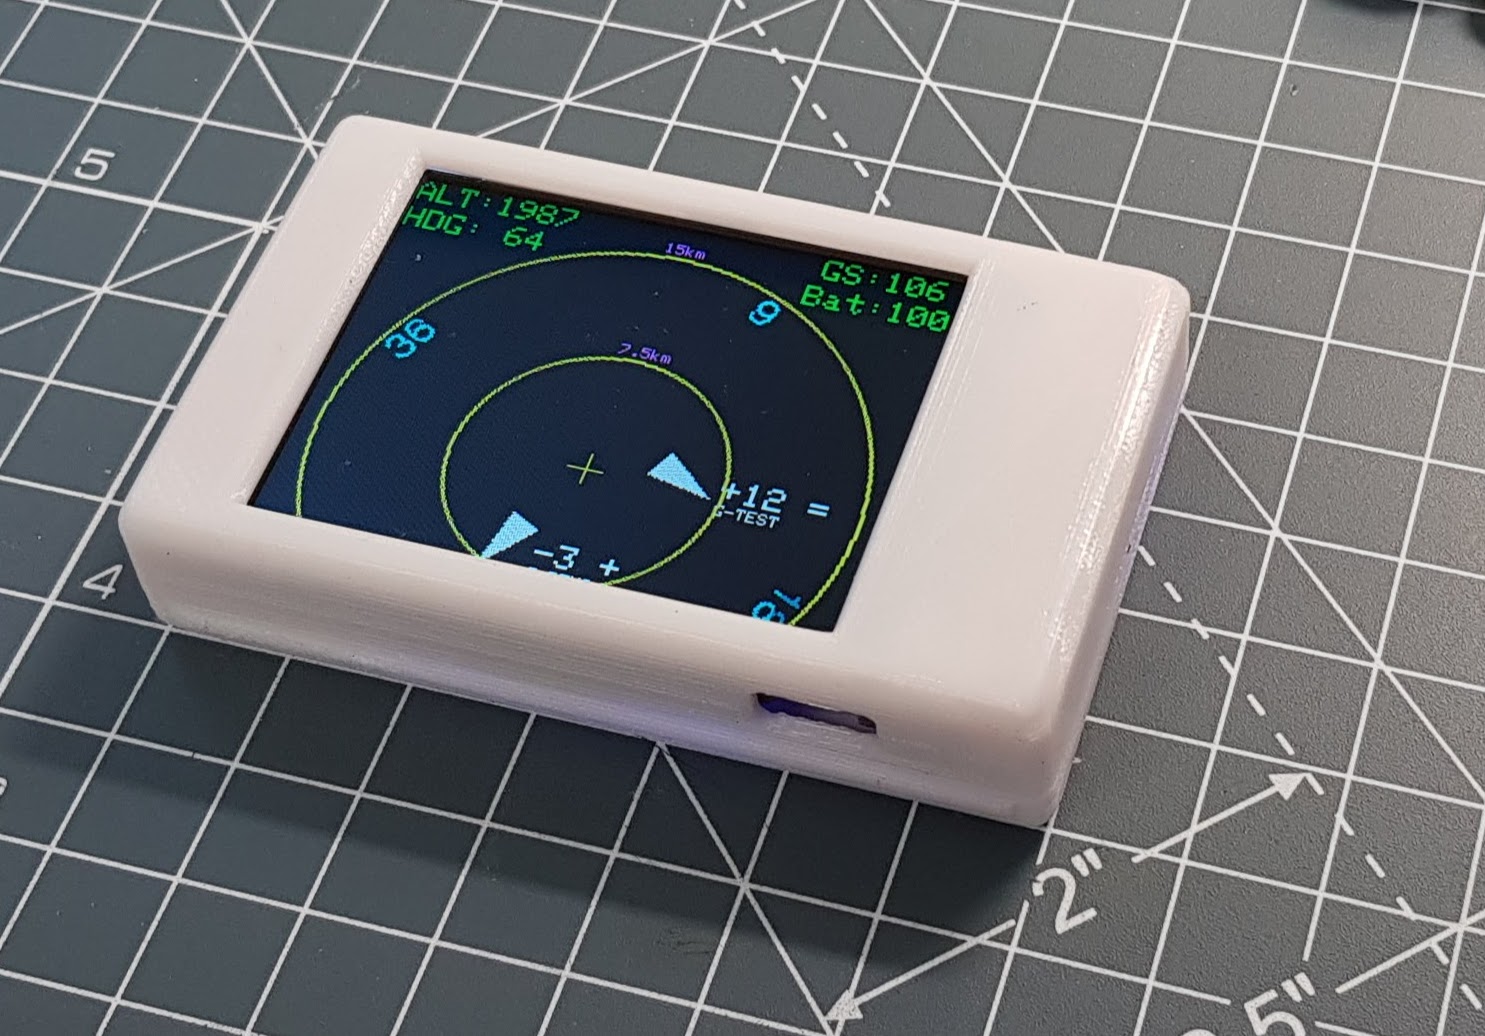
For the switch I tried a few different things and again I was thinking along the wrong lines. Plastic allows you to make flexible parts. The switch can be made out of the body in one piece, which is quick cheap and simple. Just cut a slot so it can move. I added a raised area to make it easy to find and since the print direction is left to right, its optimal for the 3D print. It worked really well and I’ll definitely use this technique in future. I wanted a black case, but have lots of white PLA that I needed to use up so the prototype cases were white.
The software was updated to hook up the ADC input to monitor battery voltage. A housekeeping task runs once per second and this monitors the voltage and displays approx capacity rounded to the nearest 25% – for simplicity.
Next Steps
- Go flying with it!
- Battery percentage calibration
- Printed Circuit Board design and manufacture